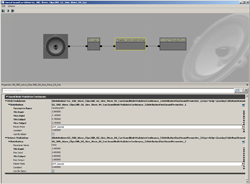
I’ve been learning more UnrealScript recently, so I decided to try making a Kismet node that would open up the Continuous Modulator SoundCue node.
For the indie developer or student, the Continuous Modulator node can be something of a dark art. It holds the key to some powerful implementation resources, but it’s relatively undocumented, and it’s nigh on impossible to use without code support.
It contains a Parameter Name property which can be hooked up to a float generated in code, which can then be used to control the Pitch and Volume of a SoundNodeWave in a SoundCue. If you open up any of the engine loops in UDK (e.g. SoundCue’A_Vehicle_Manta_UT3g.SoundCues.A_Vehicle_Manta_EngineLoop’) you can see a working example.
Normally a programmer would write code for a specific use of the CM node – this custom Kismet node will open it up a little and hopefully allow you to apply it on a more spontaneous basis.
Here’s a list of the features:
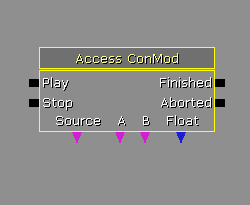
• Spatialization (SoundCue can be located in 3D space and attenuated)
• SoundCue can be attached to an actor Source
• Use Source actor’s velocity as input value for the CM node
• Use distance between 2 actors as input value for the CM node
• Use a Float as input value for the CM node
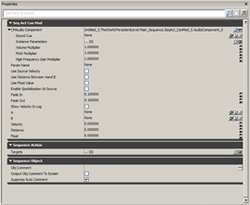
Here’s the node and its properties:
Sound Cue: Drop your SoundCue in here
Param Name: This is a unique reference to link this node and the Continuous Modulator node together
Use Source Velocity: Check this box to use the velocity of an actor attached to the Source variable link for the Continuous Modulator input value
Use Distance Between A and B: Check this box to use the distance between two actors attached to the A/B variable links for the CM input value
Use Float: Check this box to use a Float variable for the CM input value
Enable Spatialization at Source: Locate the sound at the actor attached to the Source variable link
Fade In: Time in seconds to fade the sound in
Fade Out: Time in seconds to fade the sound out
Show Velocity in Log: This is useful for seeing the speed of your moving source, so that you can set the Min/Max levels in the Continuous Modulator accurately
You can download the node here (right click and ‘save as’)
Just drop it into your game’s custom scripts folder – if you’re not sure what that is, you can put it in: \Development\Src\Engine\Classes\
If you use it please leave a comment below to say how and what for 🙂
Here’s a little demonstration video showing a few things I tried out:
Notes on the demo video:
1. Mover
Let’s say you have an actor moving around in the game and you want to use its speed to alter the pitch and volume of its sound.
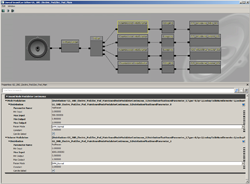
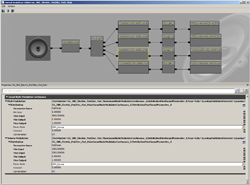
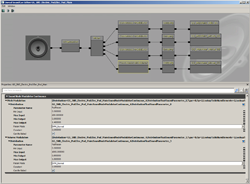
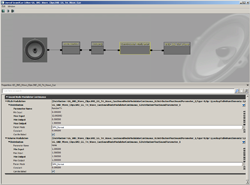
First off, set up your SoundCue. I’m using 4 different SoundNodeWaves so that as well as altering the pitches to reflect changes in speed, I can also use the volume param to fade up/down specific sounds depending on the speed. For example, I have an ‘Idle’ sound that I only want to hear when the speed is between 0 and 1000.
You can see that I’ve called the Parameter Name ‘PodParam’ – this can be named anything – it’s just a unique reference that we’ll be using in the Kismet node to send our Param data to the right Continuous Modulator nodes.
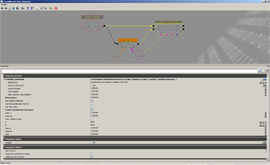
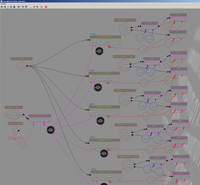
Next, set up the Kismet. In the image below, I’m attaching my SoundCue to a static mesh that’s being moved around by a Matinee movement track. This is just one way of moving an actor of course – if you want to find out more about Matinee, here’s a good tutorial.
2. Random Pitch Modulation
This demo shows how you can loop tiny waveforms (in this case a single triangle wave oscillation, 0.001s long) and alter their pitch using the Float variable. I’m using the Set Variable node to change the Float value to a random value between 0 and 10 (using the Random Float variable), every 0.1s.
3. Dynamic music
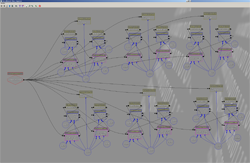
Having the ability to use game events to control the volume level and pitch of a SoundCue makes for a lot of options when planning a dynamic music system. In this example I’ve split a simple music track into 5 looped stems (3 synth parts and 2 drum parts) each 10 seconds long. In my level I’ve made 5 coloured bands on the ground, and placed a Target Point actor in the middle of each band. Each stem is assigned to one of the Target Points, and as the player approaches a Target Point, its assigned stem fades up. When the player reaches the Target Point, the volume is locked at full volume until s/he turns around and goes back toward the starting point. This effectively means that as you run along the game path, the music ramps up in intensity, and as you run back the music intensity drops down.
It works by using the ‘useDistance Between A and B’ parameter while the player is approaching a Target Point; then when the player reaches the Target Point, ‘A to B’ is switched off using a Trigger Volume (so that the volume level doesn’t drop again as the player runs past the Target Point) and the useFloat parameter is switched on, to keep the volume level fully on.
Note that in order to keep stems playing while they’re ‘switched off’ it’s neccessary to set the volume to 0.001 instead of zero. Setting the volume multiplier to zero will stop the SoundCue. A volume multiplier of 0.001 should be close enough to silence for most applications.
This is a very basic demo just to show how volume levels can be controlled – it’s pretty robust as long as you stick to the middle of the coloured bands (essentially my game path), but I’d recommend you spend some time developing your own creative solution!
4. Micropolyphony for beginners…
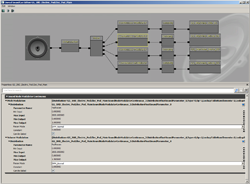
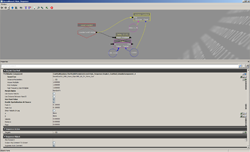
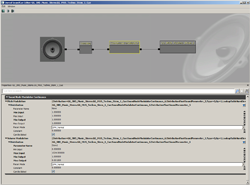
Just a quick example of what can be achieved using tiny waveform loops, amounting in total to less than 8kb, good for projects with a tight memory budget! I’m using the Float variable to modulate the pitch of 6 (not 7 as it says in the video!) triangle waves. Each waveform is placed in its own SoundCue (one of which can be seen below right), and each Continuous Modulator node has a different min and max value for the pitch – also, the time taken for one complete modulation between these pitches is slightly different for each. This results in a nebulous web of unpredictable waveform interactions…
