With no streaming capability in UDK’s audio system, all sound referenced by actors and Kismet sequences in a level is loaded into RAM on level load, and will remain there until the level is unloaded. The same applies to all other placeable assets of course, and level designers will usually use Unreal’s Level Streaming features to load/unload areas of a map as required, in order to reduce the load on memory and performance, and also reduce initial load times. It’s a good idea to manage audio in the same way.
The benefit of placing audio assets and Kismet sequences in streamed audio-only levels is it gives you very tight rein on what sounds are loaded into memory at any one time – thereby helping you to stay within budget and not exceed your maximum number of channels. It also keeps audio separate from the rest of the game, which allows for greater control over your assets/implementation, and means that the files you need to work on are less likely to be locked. This tutorial will show you how to put your audio assets in designated audio levels, and control the loading and unloading of these assets using level streaming volumes.
In a nutshell:
- Make a new level under the Persistent level and populate it with sound actors and Kismet sequences
- Place a streaming volume over the level
- Attach streaming volume to level
- Level is only loaded while player is inside volume
How does it work?
There are several ways to load and unload levels during gameplay (including Kismet based and ‘distance from viewer’) – I’m going to use Volume based streaming as it seems to be the most robust method, and it’s simple to set up and make changes to as your project progresses.
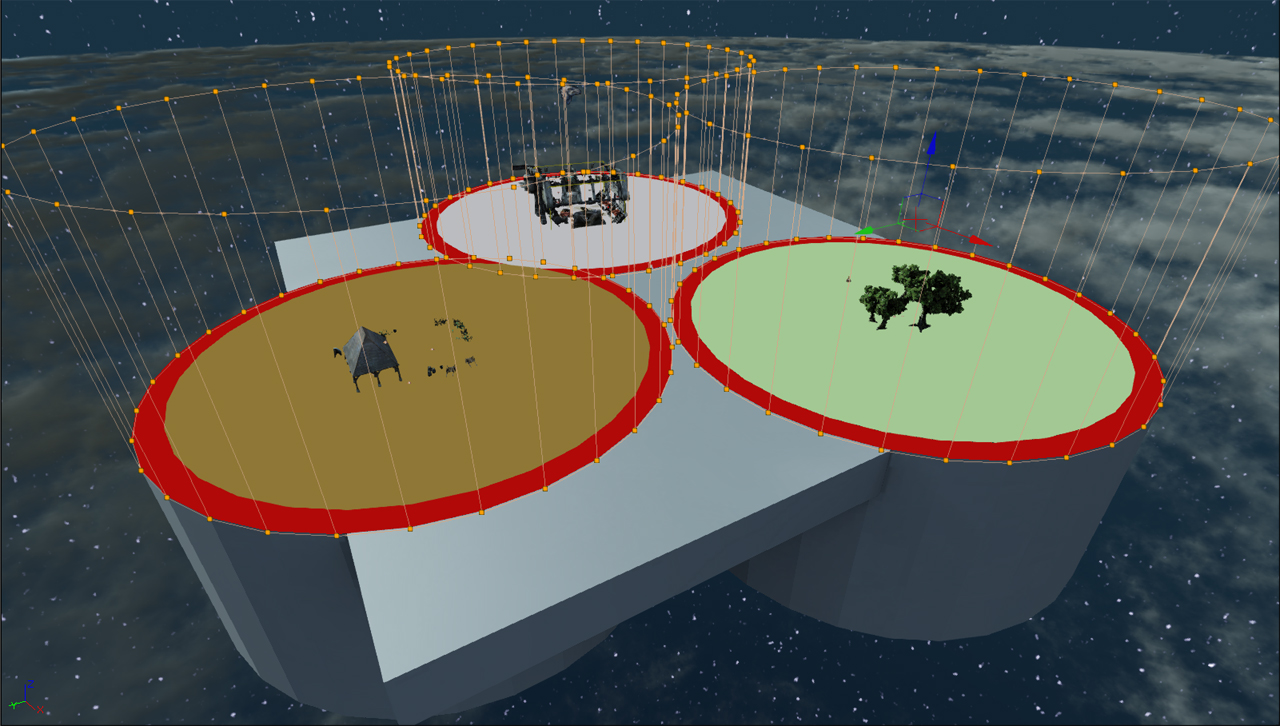
The image above shows a basic map containing 3 distinct areas, Farm (brown), Forest (green) and Industrial (grey). I’ve made a new level for each area and populated it with some simple ambient sounds. The three coloured circles show the maximum attenuation range for the sounds, and the 3 red bands show the perimeter of the streaming volumes associated with each of the levels. When the player touches a streaming volume, the level associated with it is streamed in so that by the time the placed sounds contained within it need to become audible, they are already present in memory. This obviously means that your player must enter the volume in a place where the loading/unloading of sounds is not audible – ie. the boundaries of the streaming volume must extend beyond the max attenuation radius of any placed sound actors.
(Theoretically you could place a sound into its own level with a cylindrical streaming volume placed just beyond the sound’s max attenuation radius – effectively meaning that when that sound is out of earshot, it is unloaded (this would be a very useful out-of-the-box feature btw, Epic ;)) Unfortunately this isn’t very practical because streaming volumes carry with them a small performance hit; this is something to keep in mind when planning your levels.)
Level load times will depend on how much audio is referenced in the level; you’ll need to experiment with this to make sure you’ve left enough time for the level to load before any of its audio is needed.
Steps to set it up:
- Add some levels under the Persistent level:
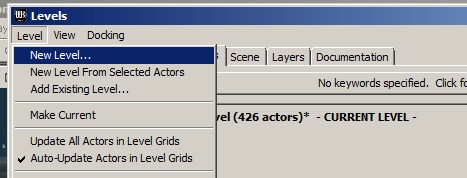
- Goto the Levels tab in the Content Browser
- In the Level menu, select ‘New Level’
- Give it a name relevant to the area (using a prefix like ‘AUDIO_’ is a good idea too)
- Leave ‘Kismet’ selected for the streaming method
- Repeat these steps for your other areas
- Save all levels
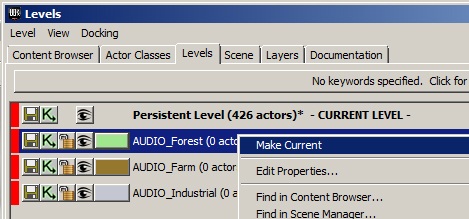
- Right click on one of your levels and select ‘Make Current’ (or double-click it)
- Now anything you add in the viewport will be placed in that level, so just add some ambient sounds as you normally would
- If you’ve already placed sounds in the Persistent level, you can select them and Cut+Paste them into the current level
- Any Kismet sequences you make will also be placed in the ‘current level’
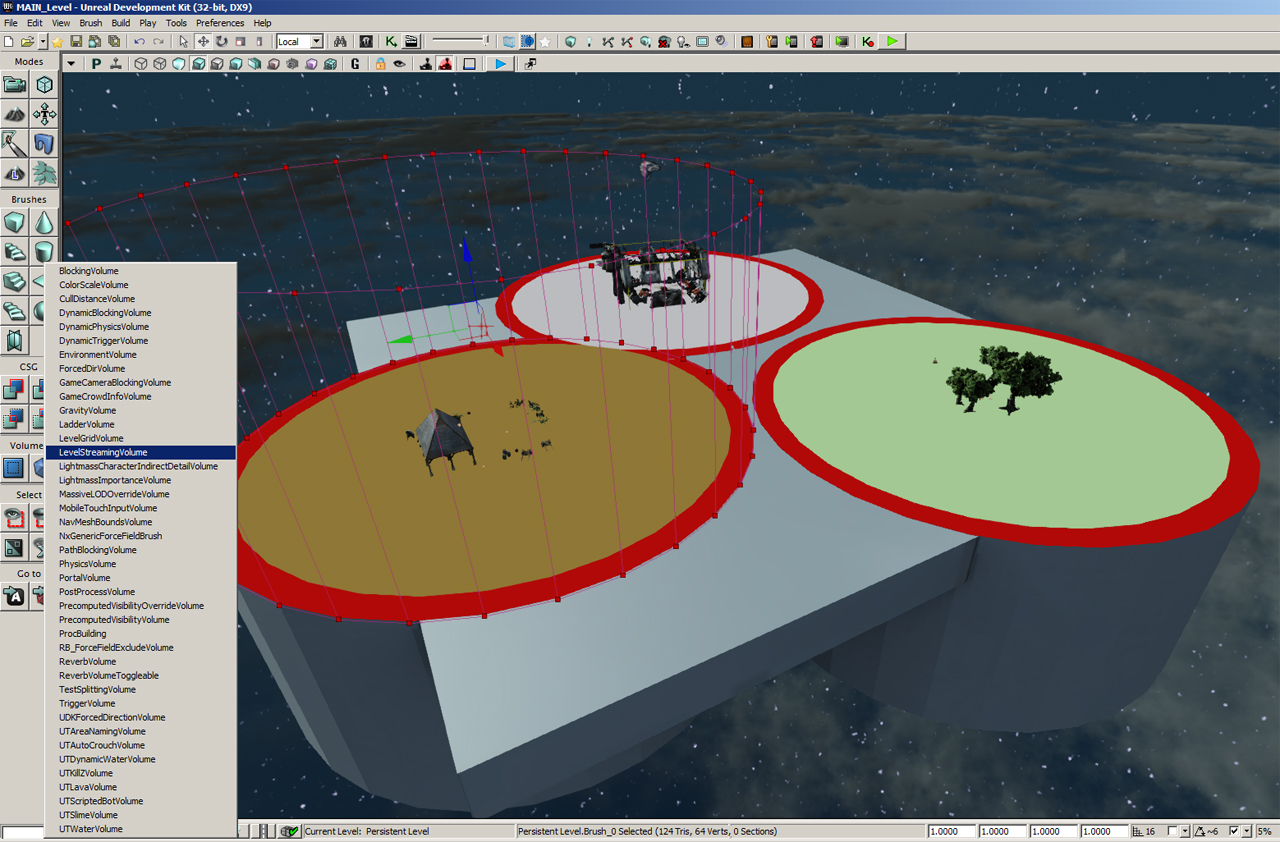
- Always place your streaming volumes in the Persistent level
- Using the builder brush, create a box (or cylinder/polygon etc. if it fits your level layout better, I’m using cyclinders) around one of your areas, leaving enough extra space around the max attenuation radii of your sounds to allow the level to stream in before your sounds start gaining
- Select the Level Streaming Volume from the Add Volumes menu
- Repeat for the other areas
- Select one of your streaming volumes in the viewport
- In the Levels tab in the Content Browser, right click on the level you want this volume to load, and select ‘Add Streaming Volumes’ (You can add more streaming volumes in this way, or clear them all and add a new one using ‘Set Streaming Volumes’
- You can see which Streaming Volumes are attached to a level by right-clicking the level and ‘Edit Properties’
- Do the same for the other streaming volumes
Add your content:
Add the streaming volumes:
Attach the streaming volumes to the levels:
Monitoring the results
Unreal offers a number of detailed resource monitoring tools for audio, I’ll be using the following:
(NB. you should only monitor whilst running the game on your target platform – this demo is on PC).
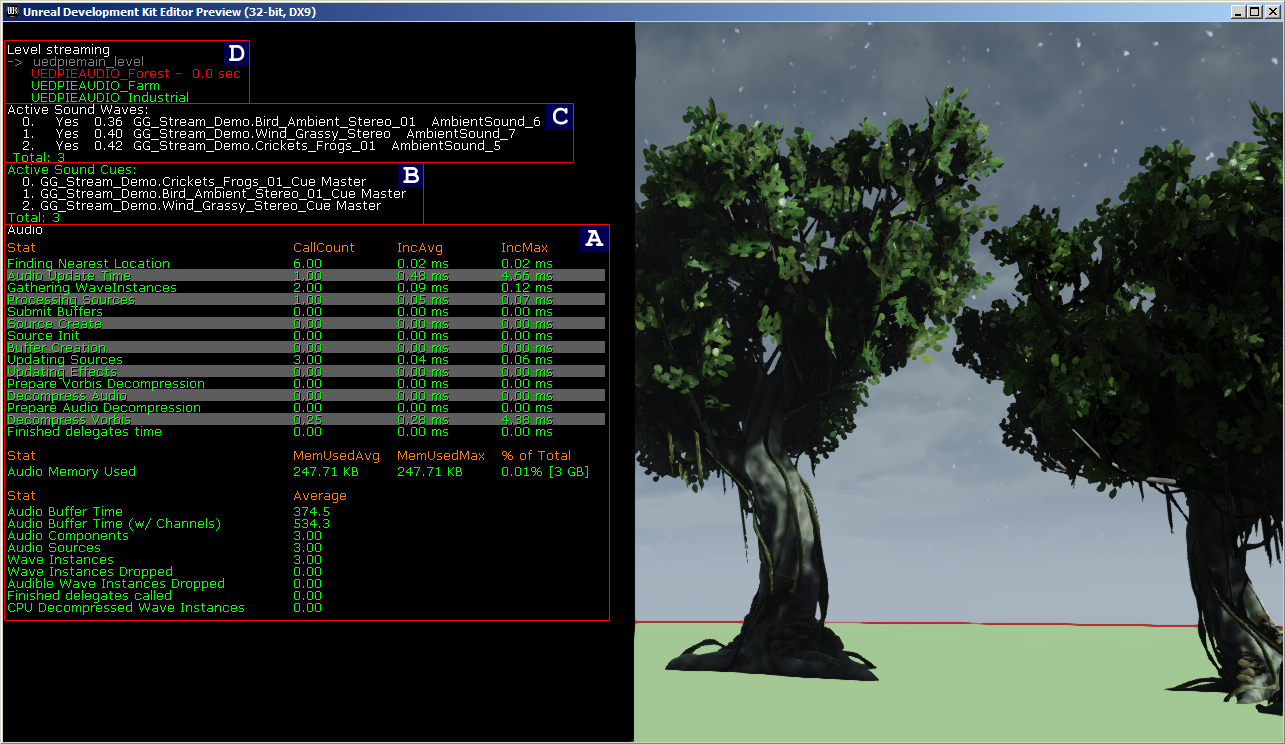
The stats I look at most are:
Audio Memory Used – Total current memory allocation for soundwave data
Wave Instances – How many soundwaves are currently playing
Wave Instances Dropped – Number of soundwaves not currently playing as a result of exceeding the maximum of number channels
Audible Wave Instances Dropped – Number of soundwaves not currently playing as a result of exceeding the maximum of number channels, which would otherwise be audible
- the volume level of the soundwavedata (ie. irrespective of any adjustments made in the SoundCue)
- the full path name of each active SoundWave (active means its current in-game volume > 0. An inactive SoundWave is still loaded in memory)
- the placed actor playing the soundwave
(Not sure what ‘Yes’ means…)
Colour codes relevant to this project are:
- Green – Level not currently loaded
- Red – Level loaded
- Blue – Level loaded but not yet removed from memory – gets removed during next garbage collection
The time taken for the level to load is also displayed.
e.g. G:\UDK\UDK-2012-05\Binaries\Win64\UDK.exe editor -log

When you execute this command you’ll get a log printout of all soundwaves currently loaded into memory, with these headers:
NumBytes/MaxBytes – these seem to relate to the object container, hence very small sizes so disregard
ResKBytes – Resource KBytes probably? Size of the soundwave data
TrueResKBytes – presumably this is ResKBytes – NumBytes
I made a quick demo to illustrate load/unload between 3 areas in a map – here’s a video. (I blacked out half the screen so the memory stats would show up better).
Unreal audio memory management with Level Streaming from ggatheral on Vimeo.
Any thoughts/questions/corrections please get in touch!
Resources:
UDN: Stat Command Descriptions
UDN: Memory Usage and Profiling